Tuesday, October 21, 2014

Propagating African Violets

I really enjoy growing African violets.


If you care for them properly, they really are easy to care for, they will bloom all year round. Something I really appreciate in the midst of a long, cold winter. Probably shouldn't've said that. Long, cold winters are still a sore spot for many of us. BAH!!

Moving right along then!

African violet foliage is beautiful, all soft and fuzzy, just begging for you to touch it!


The blooms are stunning!


And there are so many varieties to choose from!! That's where I can get into trouble. 

I want them all! 

But I don't want to buy them all. So when a friend has a variety or two - maybe three - that I don't have, but I've just got to have, I ask for a single leaf clipping from the plant. 

I take that clipping, or three, and place it into a small vase filled with water.


In two to four weeks time the clipping will begin to sprout fine roots. 

In another week or so you will begin to see new leaves at the base of the cutting. It's so cool!!


At this point it's time to plant the clippings.

I waited a little longer than usual to plant these clippings because I wanted to Mod Podge some pots for them. I may have procrastinated a little on the pots. Eh hem. 


Whatcha think? Cute, no?

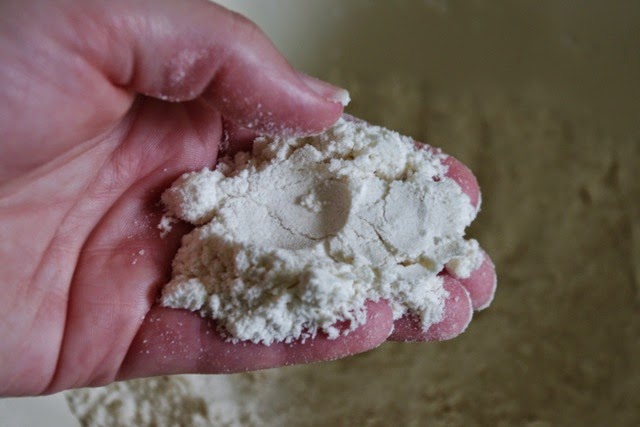
When I have it on hand, I use an African violet soil mix. This time I was out, so I just used a regular potting soil. It's not ideal, but it will do the trick.


Gently press in the potting mix. Don't pack it tightly, just gently press it in to be sure your pot is well filled with soil.


Place the cutting into the soil, allowing those new leaves to remain above the soil line.


Again, gently press in the soil around the cutting and give the soil a good misting of water.


Once the new plant has taken solid root, cut away the original leaf and watch your new little African violet plant grow!


In time, you will have a new plant bursting with flower buds! SQUEAL!!!

To keep your African violet thriving, make sure it has plenty of indirect sunlight, water enough that the soil is moist, but never soggy. I keep a bottle of water, with African violet fertilizer added, in the cabinet because the plants do best with room temperature water. And always pinch off spent blooms and leaves. 

All in all a very beautiful and easy to care for plant. 

Christine

Tuesday, October 14, 2014

Strawberry White Chocolate Scones

I know, it's October. My very favorite time of the year!

The leaves are changing color.


It's time for apples.


Time for all things pumpkin spicy!!


Oh yes I did!! Made my own pumpkin spice lattes. So good! I promise to share the recipe with you another time, but today, I want to take you back a little way to June. 

That's right, June. When you drove out to the strawberry fields to pick your youngest child's weight in strawberries.


Oh yeah! So sweet and delicious!


Fall might be my favorite season, but strawberry picking June is a close second! Yes, I just made strawberry picking time it's own season. I can do that, right??

Now some of you were very diligent. You sliced up and froze some of those beautiful berries to use at a later date. 

Not me. I scarfed them all down. Well, not just me. The Family scarfed down their fair share too. 

I will try to be diligent next year. I solemnly swear to give it my best effort.  

For those of you who were diligent, now is the time to reap the rewards of your efforts. The rest of us, who scarfed down our child's weight in berries, we'll need to make a run to the grocery store.

Either way, these strawberry white chocolate scones are da bomb! You're gonna wanna make em!

RECIPE

2 cups flour
2 tablespoons sugar
1 tablespoon baking powder
1/2 teaspoon salt
6 tablespoons butter, cut into small cubes
1 cup strawberries, cut into pieces
1/2 cup white chocolate chips
1 large egg
1 teaspoon vanilla extract
1/3 cup heavy cream

In a large mixing bowl, whisk together flour, sugar, baking powder, and salt.


Scrape those measuring cups and spoons nice and level!


Add in the 6 tablespoons of cubed, cold butter. 


Use your fingertips to incorporate the butter into the flour mixture. Using your fingertips prevents the butter from getting to warm and becoming melty. Incorporated is good.  Melty is not good. 


The mixture should be crumbly but hold shape when pressed together.


Gently fold in those lovely strawberries and white chocolate chips.


If you are using your diligently frozen berries, thaw them beforehand.


In a small bowl, beat together the egg, vanilla, and heavy cream.


Pour over flour mixture. Mix gently until dough comes together.


The combined dough will be crumbly.

I like to use an ice cream scoop to measure out individual, equal sized scones.


Drop scones onto baking sheet. Now I'm gonna tell you, this part gets messy. The dough, being crumbly, will not just neatly drop out of the scoop. NOPE! It's gonna fall apart on you. The scoop is more of a guideline. (A little Pirates of the Caribbean reference there. Anyone get that? Anyone??) 

Anyway...You will need to use your hands to gently reshape your scones. 


Crumbly indeed!

Gently dab a little heavy cream over the tops of the scones.


Sprinkle them lightly with granulated sugar.


Bake in a 350˚ oven for 18-23 minutes, until lightly browned.


Now that's what I'm talkin' bout!!


Delicious!!

Even though it's Fall, strawberry white chocolate scones are perfect for breakfast or brunch on these cool, crisp mornings. The house will be all toasty warm with the oven on, and scones baking smell so nice! Then, in the afternoon, you can stop at your favorite coffee shop for a tasty pumpkin spice latte.

Who says you can't have your strawberry white chocolate scones and your favorite, hot, Fall beverage too? Not me. Go for it!

Enjoy!!

Christine